Tacoma Camper

This camper setup was born out of necessity for our 4 month trip to Baja.  I wanted to be able to compact all of the means for self-sustained camp life into the realm of the Toyota Tacoma.  By doing so, we would have the freedom to travel wherever we wanted to go and have our home right there with us.  We wouldn't be restricted to the confines of RV and passenger car travel. I also wanted to create a camper that was lighter than the typical slide-in type of camper, and not so bulky. This would help to maintain the trucks capability for highly technical trails. As of 2004, I have replaced the original camper shell with a new one of the same dimensions. The old shell always leaked and had become progressively worse over the years. The new shell is an "Mpulse" model manufactured by A.R.E. and I was able to get it with a few options that I really liked, which you will see here. When I put the new shell on, I completely removed the cargo deck and essentially rebuilt it, using the old pieces as a template. The original setup has worked so well over the years, that I didn't really see any need to change it much.

Click photos for larger image.

Here is an overview shot of the finished project for perspective. Notice the "win-doors" where you usually see fixed windows on the side of a camper.
From the beginning - here is the Tacoma with the brand new A.R.E. Mpulse fiberglass camper shell installed. It is fastened with six clamps (not bolted). I used six clamps on my old camper shell with no problem of it ever coming loose, so I decided to do the same with this one. You can see the filler cap for the auxiliary fuel tank mounted flush on the bed near the tailgate (left-hand side). My QuickAir II air compressor is temporarily wrapped inside the plastic bag to protect it during the deck installation. (By doing so, I didn't have to disconnect it from the air and power lines.)

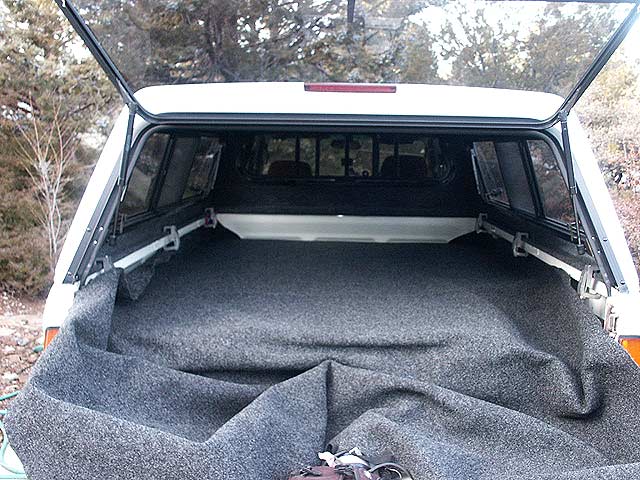
Here is the new carpet lining installed on the floor. I found this carpet at Home Depot and the color match was pretty good. It is an all-weather type of carpet, with a rubberized backing.

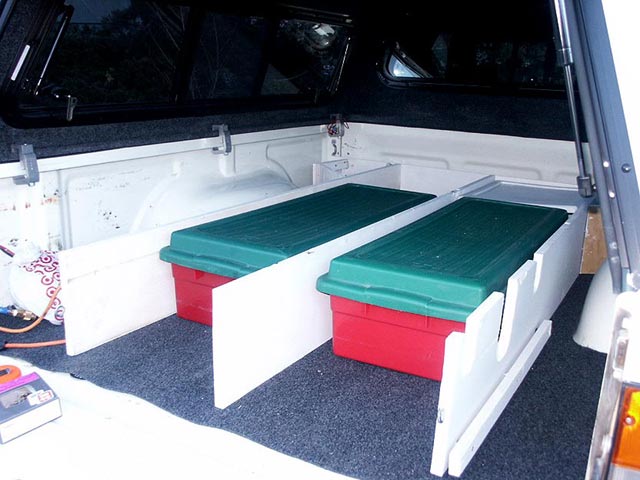
The "rebuilt" cargo deck being installed. I used the same design as my original setup that I built in 1999, just replacing any of the pieces that had any water damage or too many old deck screw holes in them. The plastic bins that fit inside the cargo bays are nice and snug. I built the frame for the below-deck compartments out of standard pieces of 1 x 10 wood.  All of it is screwed together with zinc-plated deck screws, which provide strength and the option of removal.  

Another shot from a different angle. Here you can see the cut-outs for the tool-box latches (right-hand side). 
The 3/8" plywood deck fastened to the top of the frame work. Two pieces of decking are required in order to get the pieces inside the camper shell, and get a good fit around the edges.

The deck carpet being installed. Before I found the carpet at Home Depot, I had purchased this from the camper shell dealer and it is a perfect match to the A.R.E. charcoal colored lining. It does not have any backing though. I used a professional-grade upholstery adhesive to tack it to the deck. 

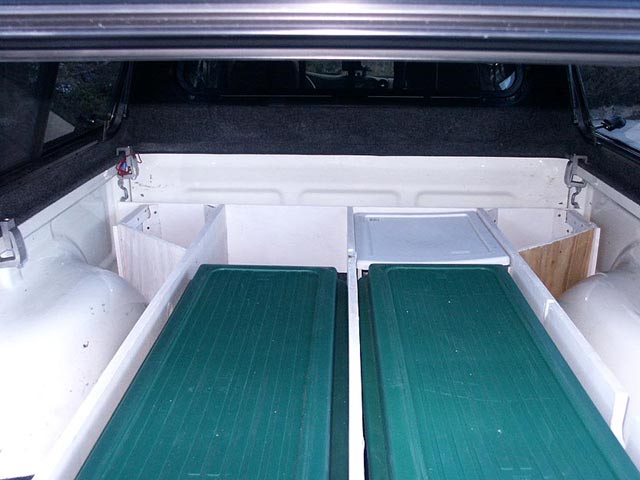
Here is the finished cargo deck complete with carpet lining.

Next Page