Sway-A-Way Coilover Rebuild - Page 2
This is a pictorial version of the maintenance that I did on my Sway-A-Way RaceRunner shocks. It is a record of my own personal experience and is NOT intended to be a replacement for the manufacturers installation instructions and/or recommendations.
Tools and parts needed:
· Sway-A-Way seal kits ( 2 )
· Torco or equivalent race shock oil ( 1 quart - more if you might spill it )
· Liquid wrench or similar thread penetrant
· Standard wrenches
· Set of small allen wrenches
· Pipe wrench
· Bench Vice
· Lots of rags
· Clean surface to lay out oily parts on
· Small pick or screwdriver
· A copy of the RaceRunner shock revalve instructions and diagram.
|
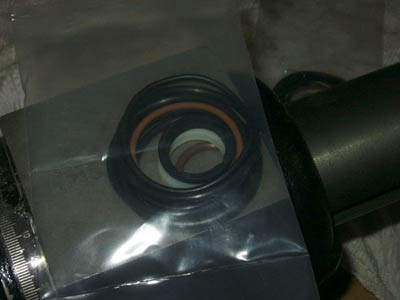
The first thing you need to do BEFORE you take the units off of your truck, is open the seal kits from Sway-A-Way and make sure all of the seals are there. There are 6 o-rings and 2 nylon/plastic seals. I only used 3 of the 6 o-rings and both nylon seals (per shock). One of these o-rings is for a part that separates the nitrogen from the oil. It is basically a disc, or piston of sorts, with an o-ring that seals against the wall of the can. I could not figure out a way to get the mount off of the can without marring the threaded can body, and thought this was the only way to get to this o-ring. I figured I would save it for next time. The remaining 2 seals are either for the reservoir (which I do not have) or just extra, duplicate o-rings. (Since doing this write-up, the So-Cal TTORA guys told me how to get that last piece out. You will see it on page 7. |
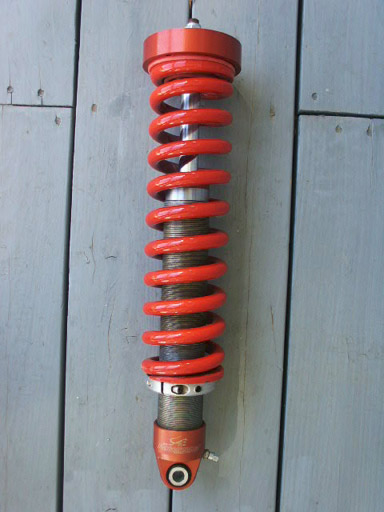
| Next, you will need to remove the units from the truck, in the reverse order of the procedure described here. You may want to take some reference measurements to make sure you adjust the collars/lift to the same height when you re-install the units later. Before you remove them from the mounts on the truck, go ahead and spin the collars down far enough to take all of the tension off of the coils (this was about 1 1/2" for me). After removing them, it is a good idea to clean them up before you begin the rebuild. Here is a photo of one of mine after over 25,000 miles of use. Not too bad! | |