On-Board Air System

I have equipped my Tacoma with an on-board air system that serves two primary functions: To re-inflate tires after using them at reduced pressures for trail use, and to supply air pressure for an ARB air locker that is installed in the front differential.
There are many different types of air systems to choose from, and I decided on a permanently mounted 12V compressor because it will continue to produce air during long trips and in remote locations where pressurized CO2 may not be available. When it comes to sheer filling power, a CO2 system (QuickAir CO2, Powertank, etc.) will by far out-perform any 12v air compressor that I know of, and they are so convenient for filling large tires and can even be used to run air tools and re-seat tire beads. The ultimate would be to have both systems (C02 and a compressor) for the convenience of the CO2 and free and reliable air that a compressor produces. Of course, having both systems on-board at once creates a redundancy when you consider the additional weight and space occupied. Remember, every ounce counts. For weight, reliability, and cost considerations, I am satisfied with a mid-range compressor. Durability and performance are key factors.
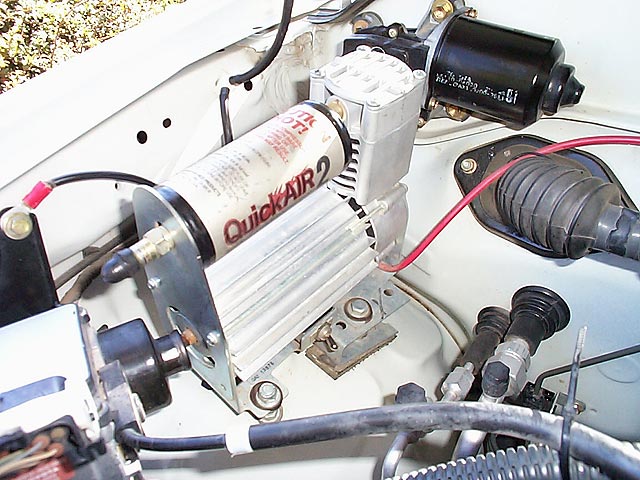
The QuickAir II air compressor, made by Sun Performance, has proven to be a robust and durable piece of equipment that is "mid-range" in terms of price, performance, power consumption, bulk, and weight. When choosing a compressor that will serve double-duty for not only inflating tires, but operating an air locker, it is important to choose a model that not only has a high volume of air output (cfm), but one that will attain a high enough pressure to operate the locker. The QuickAir II specifications are as follows: At 0 psi, 2.18 CFM at 22 amp current draw. At 105 psi, .77 CFM at 28 amp current draw. Weight is 10 lbs. It takes about 2 1/2 minutes per tire, to pressurize my 32x11.5x15 tires from 17 psi to 34 psi.
(Click on photos to enlarge)
on to Part
II
Home