Sway-A-Way (SAW) Installation
This is a pictorial version of the installation that I did on my Tacoma. It is a record of my own personal experience and is NOT intended to be a
replacement for the manufacturers installation instructions. Click here for a text version of this document.
Part II - Installing the new units.
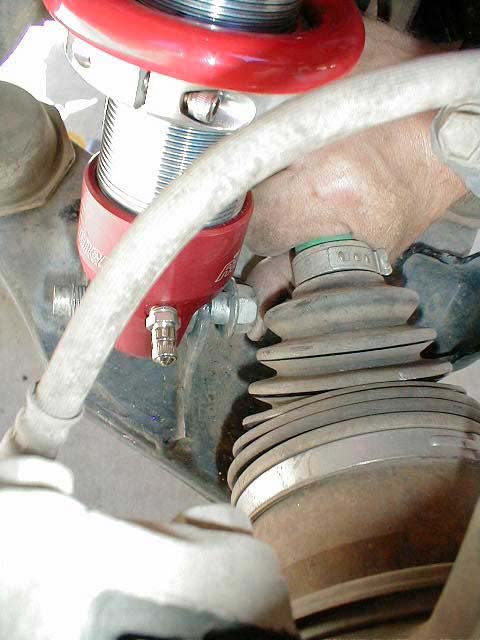
1. Before installing the new units, you will need to decide if you want to install them with the schrader valve (air valve) facing outboard, or inboard. Sway-A-Way manufactures the units so that the schrader valve faces outboard, so if you choose this position you can proceed to step two (2). A reason that you may want to consider facing the valves inboard is that the valves may be susceptible to damage in the rare instance that the wheel is turned at full lock while the suspension is fully extended. This photo was taken of the passenger side while the truck was in this position. It is my opinion that the schrader valve is vulnerable to this damage regardless of whether or not you have the original version of the coil-over, or the current version with the recessed schrader valve. Even the recessed version is not completely recessed, so if you look at the photo you will see that as long as any amount is protruding, there is still a possibility for damage. This might vary depending on the particular truck, but I have even seen small marks on the aluminum to indicate it is possible with any shock of this kind, regardless of a schrader valve or not. ABS brakes do not have any effect either way. I do not have ABS and I have broken one of my valves once, and an examination of the valves revealed that another one had been hit by the brake caliper assembly, but did not break. I decided to reinstall mine with the valves facing inboard and have never had any problems since then. If you want to do this, loosen the small allen screw on the adjustment collar and simply spin the adjustment collar towards the bottom shock mount until all of the tension is taken off the coil spring. After relieving the tension, you can spin the lower mount 180 degrees so that the schrader valve faces the opposite direction of the RaceRunner logo on the top mount.
2. If you haven't already, loosen the small allen screw on the adjustment collar. Measure the amount of threads showing on the new shock between the bottom of the adjustment collar and the lower shock mount. They should be equal
(somewhere around 1 ¼" - 1 ½"). If not - use the spanner wrench (or) insert the allen wrench into one of the holes on the collar and adjust as necessary to get them equal. You can do this just to put a little bit of tension on the coil spring before mounting it on the vehicle.
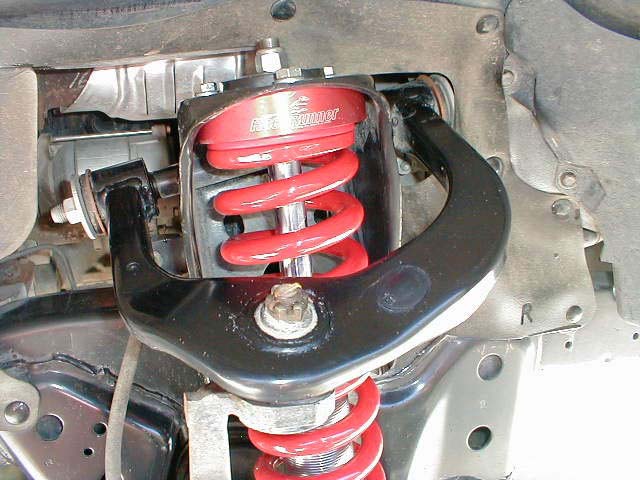 |
3. Align the new assembly into position under the top-mounting surface with the RaceRunner logo facing out towards the wheel location. If you mount the unit per Sway-A-Way's instructions, the bottom mount is supposed be positioned with
the schrader valve facing out towards the wheel. If you wish to face the valves inboard, see step 1 above.
4. Install the top (3) new bolts and washers supplied with the shock. Do not tighten them down yet - just get them started enough to hold the shock in place.
|
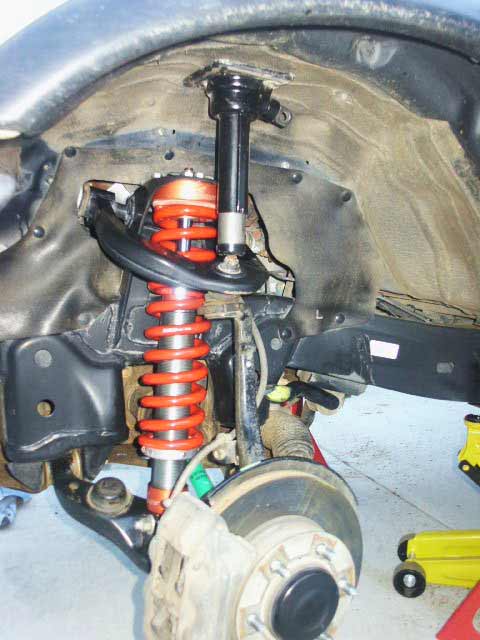 |
5. In order to install the lower bolt, you will need to place the bottle jack upside down between the underside of the fender well and the upper A-arm. Position the top cap of the bottle jack so it rests on the spindle bolt. Proceed to turn the jack so that it pushes the A-arms down until the lower shock mounting tabs are aligned with the bolt hole on the lower shock eye. |
|
6. After you have lined up the shock tabs with the shock eye, put the lower shock bolt through the mount. It helps to grasp the CV half-shaft (axle) with your hand and use your thumb to push the bolt into place. After the bolt is successfully in place, install the nut with washer and tighten.
|
 |
Part II Continued